Saturday, December 8, 2012

Healthy Energizing Snacks for Finals


As finals week comes around we often find ourselves in the library or our dorm rooms studying for endless hours and focusing so much on school work that our eating schedule gets messed up and before we know it we’re digging into a bag of chips or a candy bar from the nearest vending machine. There’s many ways to prepare healthy snacks to take with you on the go, but also knowing what foods will give you more energy and which are healthier will influence you to make better eating choices.

Honey
A spoonful of honey is nature’s equivalent to an energy drink! Honey is a natural sweetener that helps replenish you muscles, especially post-workout. You can add honey to anything from yogurt to tea!


Fruits
Fruits are filled with glucose, which our bodies can easily metabolize into energy. They can be digested in less than half an hour which makes fruits a quick, nutritious way to get a burst of energy. Best fruits to eat for energy: bananas, apples, oranges.


Almonds
Almonds are packed with copper and manganese which play an essential role in keeping energy flowing throughout the body and make them a great snack to keep at your desk or in your bag!


Yogurt
With so many options to choose from, yogurt is an essential snack option when you need something on the go. It’s filled with magnesium, which is crucial for the release of energy, and also adds a dose of calcium to your diet!


Cottage Cheese and Apples
Slice and apple and top it with ½ cup of low-fat cottage cheese for a healthy snack filled with protein, calcium, and fiber.


Fresh Vegetables with Dressing
Cut up vegetables such as cucumber, carrots or baby corn and dip them in a low-fat dressing such as Red Pepper Vinaigrette or Carrot-Ginger for a fiber-rich and low calorie snack!


Celery
Celery is a vegetable that provides a lot of fiber and natural water content and is a great snack when trying to lose weight as well. Pair cut up celery sticks with hummus or peanut butter for a tasty day-time snack that will keep you going through the day!


Hopefully some of these healthier snack options will interest you and stop you from reaching for that bag of chips during finals week! Enjoy!

Sunday, November 25, 2012

CYBER MONDAY DEALS


As we leave Thanksgiving and Black Friday behind us we welcome a fast approaching and newly monumental online holiday: Cyber Monday. In just one day, hundreds of people will enter their credit card numbers onto online shopping sites and purchase products ranging from designer shoes to sewing machines at bargain deals they won’t see again until Cyber Monday 2013. Cyber Monday has quickly became one of the biggest shopping days of the year as many companies claim their sales dramatically increase the Monday after Thanksgiving due to their online sales.

Just so no one is left out on this holiday I have compiled a list of some of great deals that I have come across and plan on taking advantage of myself this year!

Amazon: For the past week, Amazon has been having “Deals of the Day.” For Cyber Monday specifically they say that their deals are in limited supply and will go quick, but they plan on adding new ones throughout the day and rest of the week in case you miss out on the one you were hoping for! Some of their Monday deals include: 50% off or more on iPad cases and 20% off or more on laptops, tablets, desktops and monitors.

Old Navy: They are having an online only sale Monday in which you can receive 30% off your purchase with code: CYBER at checkout. The 30% discount can be applied at their sister stores Gap and Banana Republic as well. At their other sister stores, Piperlime and Athleta, you will receive a 20% discount off your order with the same code.
            
Vera Bradley: This store is offering free shipping on any orders over $75 and has a few specialty products on sale specifically for Cyber Monday. These specials include their: Large Duffel bag for $49.99, Backpack for $39.99 and Hipster bag for $29.99. There are also a variety of colors from past season that are on sale this holiday season and are worth checking out!

JoAnn Fabrics: Web Exclusive Sales for Cyber Monday include 30% off entire stock of yarn, 30% off entire stock of crafts, up to 40% off entire stock of jewelry-making supplies, and 60% off all red tag apparel fabrics! There is also free shipping with no minimum purchase at Joann.com with promo code: RTFD331!

F.Y.E.: For your music/movie fix, this store is having an online special Monday in which when you purchase 3 used CDs/DVDs you get the 4th free by using the coupon code: USEDB3Nov. This is a great discount to consider when shopping for family members or friends!

Hopefully these online discounts for Cyber Monday will make your shopping experience this holiday season a little easier on you! What’s the best deal that you received on Cyber Monday this year?!

Wednesday, November 14, 2012

DIY: Adding Flare to Unexpected Places


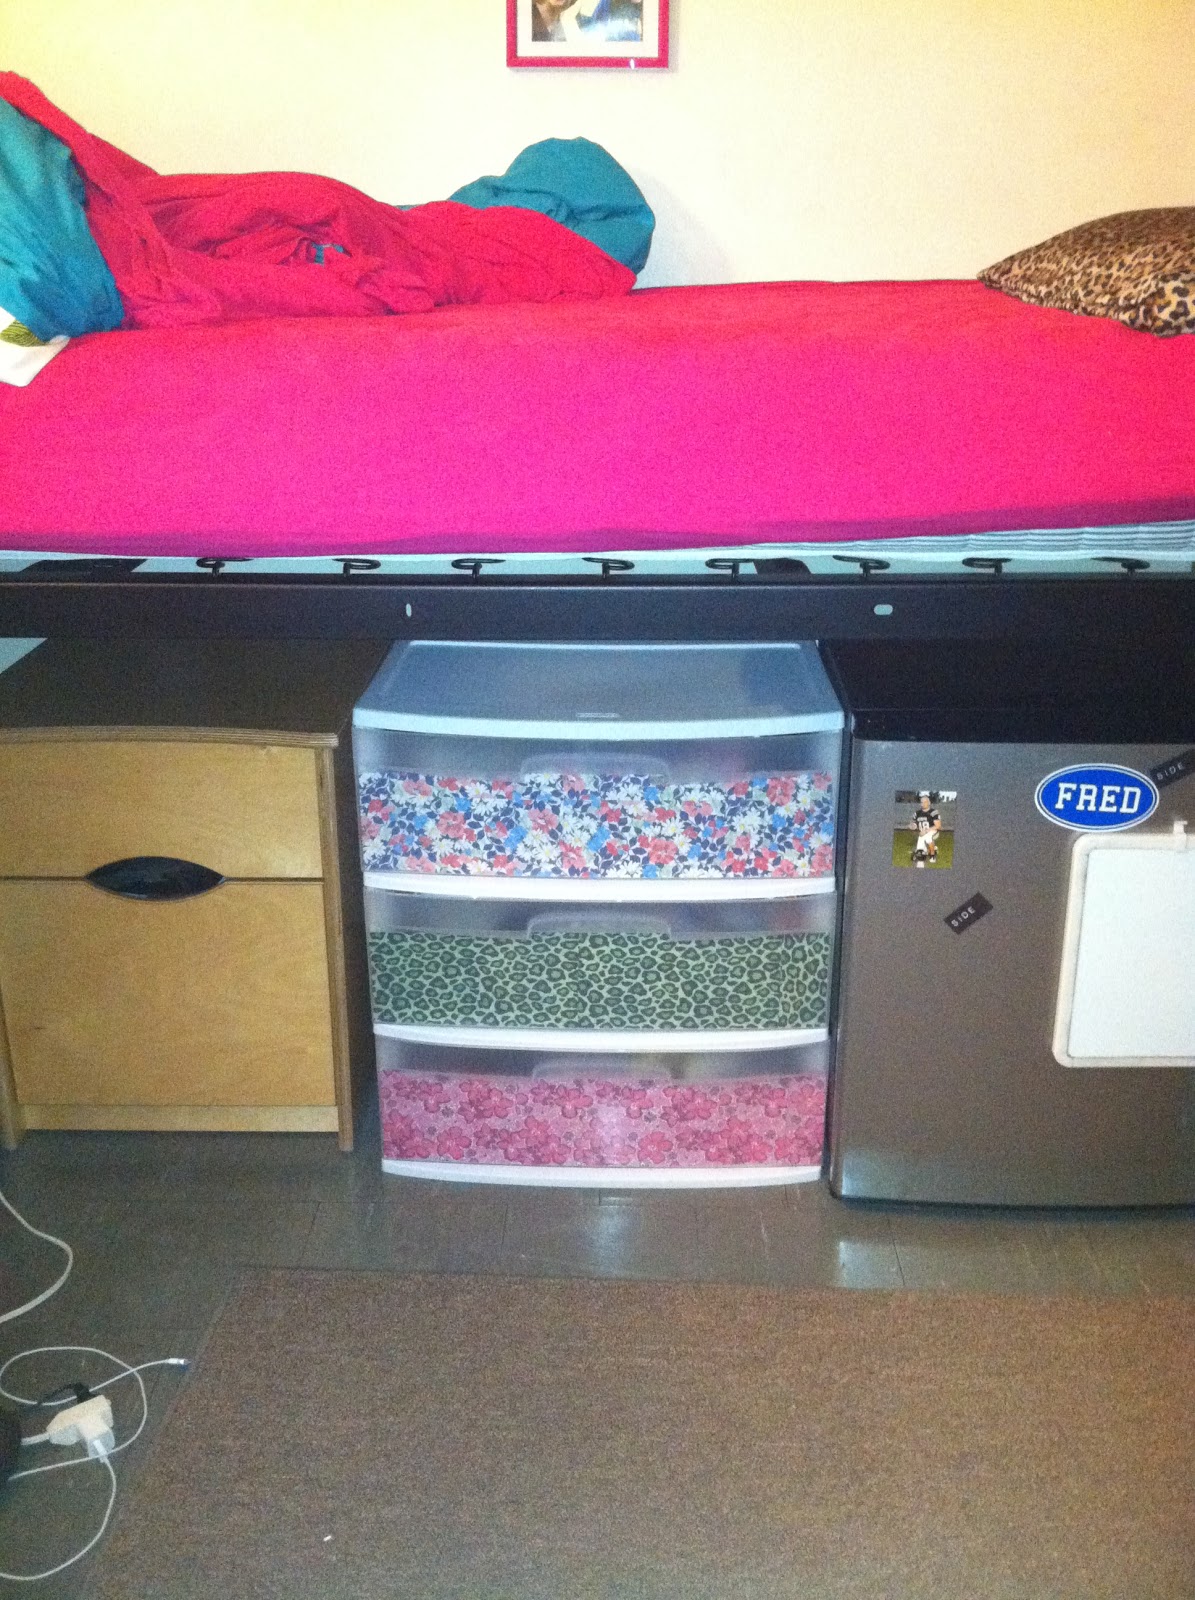
When we go to college, most of us don’t anticipate how little our closets really will be and we often over-pack and find ourselves at Wal-Mart looking at the hefty prices of those commonly used plastic bins. You can usually find a three-drawer bin in white or black for around $20. Sometimes we are forced to purchase these boring bins to store those extra t-shirts and tank tops that we had to bring with us or maybe you’re in need of the extra storage for all those little knick-knacks that you never thought would take up so much room. Regardless of the reason, these bins are usually an eye-sore and because they are clear any one that comes in your room is able to see right through your drawers. And let’s face it ladies, maybe you’re storing your lady products in there and quite frankly the entire world doesn't need to see that every time someone visit’s your room. Or maybe it’s your food drawer and we all know that one friend who asks for some of your food or “to try it” every time they walk in the room, well I have a solution for you: paper inserts!

BEFORE


 AFTER


This is a very simple DIY project that can be done in as little as fifteen minutes and gives you room that extra flare and adds a nice personalized touch!
  • ·     To get started I researched three different prints that I wanted to use on each of the three drawers and printed out two 8 ½ x 11 pages of the print as large as I could make it.
  • ·        One print at a time, I placed them inside the drawer and traced on the back side (white side of the paper), with a pencil, the outline of the drawer so I knew where to cut it. I would give you dimensions on how to cut it, but the size will differ depending on the shape/brand of your drawers.
  • ·        Once you do the first one and cut it out, you can just cut the remaining two patterns based on the size of the first one, to save time.
  • ·        In my examples I used the extra scrap pieces that I cut off to place on the far right side of the drawer because my two papers weren't long enough. For some drawers, you made need to print off three pages of each pattern.
  • ·        Finally, tape, from the inside of the drawer, the paper to the plastic part of the bin to keep it in place!
  • ·        Now close your drawers and tap a step back to admire your new stylish masterpiece that is sure to get attention from the next person that enters your room!

For this project you can do color themes such as this one:


I choose three patterns that had pink colors in them.
          •      Lily Pulitzer Sigma Kappa Sorority Print
          •      Vera Bradley Very Berry Paisley Print
          •      Pink & Black Damask Print


Or you can also do a pattern theme.


I chose three Vera Bradley patterns.
          •     Summer Cottage Pattern Print
          •      Baroque Pattern Print
          •     Very Berry Paisley Pattern Print


Or you can also do a random selection of your favorite patterns!


          •      Vera Bradley Summer Cottage Print
          •      Green & Black Cheetah Print
          •      Lily Pulitzer Sigma Kappa Sorority Print


Creating a picture collage, using solid colors, or even using wrapping
paper would be great ways to personalize this craft!


Thanks for reading, hope you enjoyed! 
What patterns would you use?!


Wednesday, October 31, 2012

DIY Multi-Color Halloween Cake


HAPPY HALLOWEEN!


As hard as it is to believe, October is finally ending and we are beginning the stretch towards the long winter ahead. But before we begin thinking about Thanksgiving, Christmas, and New Years parties, take a minute to embrace the fall season and enjoy Halloween the best you can! Whether you’re planning on going to a Halloween party, or you’re just looking for a seasonal treat to make this Halloween, this cake is a great way to make your friends think you’re the next Great Baker on Cake Boss! It’s an easy and colorful way to turn that $1.29 box of white cake mix into a master piece everyone will love to dive into!


For this cake you will need to purchase white cake mix, two containers of white cake frosting (preferably the Pillsbury Funfetti brand because it comes with free sprinkles!), one package of food coloring, a box of Ziploc bags (if you don’t already have some!) and a tray to place the cake on for display (pink striped tray in my picture)


  • 1.      Start by mixing together the white cake mix according to the directions on the back of the box.
  • 2.      Depending on how many colors you want to dye the cake split the cake batter into that many bowls. For my cake I used 3 colors: green, purple, and orange.
  • 3.      According to the directions on the back of your food coloring package, dye the cake batter the color you are trying to obtain. There are usually directions for “cake mix” food coloring, but if there isn't you may want to look it up on the internet for the specific color you are looking to create! For mine, I used about 50 drops total for each.
  • 4.      Next you want to make sure that you spray your pan with cooking spray or oil.
  • 5.      Now drizzle the cake batter around the pan in random patterns until you use all of the batter OR you can layer the batter in the pan. For example when making my cake, I could have put the entire bowl of green batter in first, and then the orange and lastly the purple. After baked this would give the cake horizontal lines of each of the colors.
  • 6.      Lastly back your cake according to the directions on the box!
Let your cake cool for about an hour and using a spatula go around the sides of the cake and separate the cake from the pan so that you can remove the cake and place it on your tray. Once you separate the cake with the spatula as best you can, place the tray on top of the cake pan and flip it over so that the cake is separated from the cake pan and on the tray. This will give you a platform to decorate your cake.

Before decorating, let your cake cool for between 4-6 hours, and if possible overnight.
When you are ready to start decorating your cake designate one container of frosting for the base coating of the cake and its sides and one for the decorating part.

  • 1.      Using a bowl add food coloring (as designated per color on the package for cake frosting) to one container of frosting and frost the base of the cake.
  • 2.      Then, for my Halloween cake, I mixed together 1/3 of the second container of frosting with purple food coloring to decorate the border and sides of the cake.
  • 3.      Place the frosting in a zip lock bag and cut the corner of the bag to your discretion. I would suggest cutting a small corner off at first and then cutting a bigger piece off. Start with a cut as small as one centimeter from the corner!
  • a.        It’s important to practice writing/decorating on a paper towel/napkin/piece of paper first to get a feel of how to do it on the cake.
  • 4.      Next, make as many bags as you need for each color you want to use. For some colors such as the green on my Halloween cake, I only used about two tablespoons of frosting.
  • 5.      Go crazy! Decorate your cake in any way that you choose and make it personal to you: add sprinkles, candies, cookies, etc. Just remember that you can always fix any “mistake” that you think you made and don’t be afraid to try something different! If your cake turns out bad you can always just eat it and try again another day! I personally have no cake decorating experience but I love to try new things with the few cakes that I have decorated. It’s super easy to do when you put your mind to it and concentrate. I haven’t used any decorating tools yet so my cake’s are pretty basic, but I try and do the best I can with what I've got! This Halloween cake is the fourth cake that I've tried decorating, hope you enjoy!

Good luck and happy baking!

First Cake

Second Cake

Third Cake


What’s your favorite holiday to bake for?!

Wednesday, October 17, 2012

Decorating Your Home Away from Home


As any college student knows, college dorms are not the homiest of all places. They are typically bare, white cinder block walls which are not fun at all, but there are many fun ways to personalize your room and add color! Here are my favorite inexpensive ways to decorate your dorm room wall:

Photographs:
A great way to personalize any room is by adding pictures to it! Especially in your dorm room, pictures remind you of all the good times with your friends and family at home and as the year goes on you can add pictures from the semester to your wall. Photo collages are a great way to seem crafty and make your picture collage unique!

Photo Collage:
Photo collages can be in any pattern or shape that you like!


Meghan Ermi, St. John Fisher Dorm (Rochester, NY)

Arranging your photo’s into the shape of words makes the photos look inspirational and gives them more meaning. This idea doubles as a photo collage and a piece of art on your wall! You will be sure to get compliments on this photo collage style!


Kelly Forstbauer, SUNY Fredonia Dorm (Fredonia, NY)

Simply arranging your photo’s into a large group on one of your walls is also a great way to spice up your room and give that homey feel to such a boring white dorm room wall. You can also try adding bright, colorful construction paper behind the pictures to make them pop against the bare walls. This will draw attention to your photos and will be sure to start conversation with friends!

Canvas Pictures:
Using canvas photos are a great way to make your room more personalized and will be sure to remind you home and maybe your mother in particular, or at least it does to me! You can buy canvas pictures at Wal-Mart, Bed Bath and Beyond, The Christmas Tree Store and many other places starting at about $5!


Leah Cripps, SUNY Fredonia Dorm (Fredonia, NY)

Posters:
Posters are a great way to express yourself because you can buy a poster with pretty much anything you can think of on it! They are a great way to tie together a room or accent a wall. At Fredonia, we have a huge select ion of posters in our book store which is a great place to start looking, though they are a little pricey. Other great places to look are at craft stores, such as Michaels, Wal-Mart, the Paper Factory, or online at websites such as Amazon, which may be cheaper than your school book store.


My room, SUNY Fredonia Dorm (Fredonia, NY)

Quotes:
Using quotes for your wall is a great idea! I’ve seen students use pictures to write out quotes or get wall stickers that have quotes on them, but here at Fredonia our walls are cackled so stickers don’t usually work out as well. This year, one of my suitemates showed me another great way to decorate your walls using quotes. She wrote out quotes with colorful markers in different fonts on index cards and arranged them on her wall above her bed. This idea will definitely ensure you have a great day, every day! Who wouldn’t when you could wake up every day to an inspirational quote by your favorite person?


Kelly Forstbauer, SUNY Fredonia Dorm (Fredonia, NY)

Post Cards:
Using post cards to decorate your walls is a unique and cheap way to add style to your college dorm room. This summer I visited New York City and bought ten post cards for $1! I placed them on my wall above my bed in-between my pictures to remind me of the amazing trip!


My room, SUNY Fredonia Dorm (Fredonia, NY)


I hope these decorating tips help you to personalize your dorm room and make it the perfect home away from home for you! How did you decorate your dorm room or room at home to let your personality shine through?

Friday, September 28, 2012

14 Snazzy Scarf Ideas

Hey guys, thanks for checking out my blog! If you're looking for fun DIY crafts and fashion tips for college life, you've come to right place.

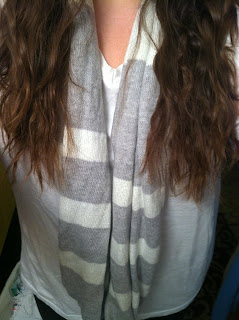
Given that summer has just ended, us girls are now embracing the fall weather and pulling out our sweaters from the back of our closets and the bottom of our dressers. What better way to compliment a sweater than with a bright colored scarf! Scarves can compliment any outfit whether a t-shirt, cardigan, or sweater. Here are fourteen different ways to wear a scarf:

1. Even Front Pull Through 

2. Un-even Front Pull Through

3. Double Knot (Long Scarf)

4. Double Knot (Short Scarf)

5. Basic Square Scarf Wrap

6. Square Scarf Double Wrap

7. Basic Scarf Wrap with Front Knot

8. Infinity Scarf Single Loop

9. Infinity Scarf Double Loop

10. Long Scarf Dangle 

11. Long Scarf Dangle with Solo Knot

12. Long Scarf Side Front Knot

13. Long Scarf Side Throwback

14. Short Scarf Wrap-Around

One can never have too many scarves.

I hope these different ways to tie scarves inspire you to try something new this fall! What's your favorite way to wear your scarf this season?!